
Cleaning and Preparing Brass Casings for Reloading: A Quick Guide
In this guide, we will answer some of the most common questions that reloaders have about cleaning and preparing brass casings for reloading ammunition. Cleaning brass is a necessary but time-consuming process. Fortunately, we've compiled some of the best tips and tricks that will help you get your casings sparkling in no time! We'll talk about how to prepare brass, what materials you need for cleaning, and some inexpensive options so that you don't have to spend as much on tools and materials.
Before you get started cleaning your brass you need to keep in mind that primers and gun powder have lead in them and certain exposures to lead can be dangerous. If you have a baby you will want to wash your hands thouroughly and/or wear gloves while handeling dirty brass so your little one doesn't suck on hands soaked in lead. Also, dry tumbling will put off a large amount of dust. This dust will contain lead. So, you should dry tumble in a garage or other area outside of your living areas to avoid lead exposure.
During your cleaning process you will want to inspect cartridges for cracks, deformities, or signs of excessive wear that may indicate they are too old to be reloaded safely. Some people will do a check at the end of cleaning and some people will do their check before cleaning, and some people will check before and after to make sure they didn't overlook anything. I prefer to do my check for bad casings after I clean them. Normally there aren't but a few out of one hundred that need to be thrown away. I feel like I can see the deformities,wear issues, and cracks better once the casings are clean.
To remove or not remove the primers, that is the question.

I use my premium deprimed brass for precision or hunting rounds and will leave the primer in when cleaning for my recreational rounds.
If you are a precision loader and are worried about tenths of inches at 100 yards you will want to make sure your primers are removed before cleaning the brass. However, you may have noticed that turret and progressive presses have primer removal and priming on consecutive steps. Not requiring you to remove the primer then clean then run through the process. Also, some of the biggest names in shooting have mentioned that they do not remove primers before cleaning. I do not remove the primer before cleaning the casses but will say that I will have a couple of cases out of 100 that have issues with inserting a new primer. I will put these aside and once I have enough of them I will clean out the primer pocket and put back into my ready to load pile.
Trimming picked up brass.
Another item of contention among reloaders is trimming brass. Yes, if you are a competitive shooter or you are just wanting to maximize your weapons performance and reliability you will want to make sure your cases are the exact size you want them to be. So, you should measure them with calipers, make sure they are the right size, trim any long cases, then deburr then to make sure they chamber correctly.
However, if you are just reloading for the sake of saving money, or if all you do is shoot for fun and practice then it might not be worth trimming brass. It can make a huge difference in how much work goes into reloading. Between measuring, trimming, then deburring it takes about 10 seconds per case. So, you will be adding about 17 minutes to the time it takes to reload 100 rounds. It may be a good idea to to trim your brass if you are picking up new brass from the range that you haven't ran through your gun yet, but if you are reloading brass that you have already ran through your gun you may be able to skip this step. Personally, I have ran thousands of rounds of reloaded ammo through my .223 and haven't trimmed any of them. At the beginning of my reloading endeavours I did have some issues with my 9mm loads but not because of case length.
Cleaning the Cases.
Before you can gather all of your materials for cleaning brass you need to identify what process are you going to use to clean your brass. There are 3 main options to consider: manually clean by hand, media dry tumbler, or wet tumbler. Of these 3 options, 2 of them require you to dry the brass. Putting brass in an oven is an option many reloaders use to dry their brass after cleaning. Primers are pretty resistant to heat and won't ignite unless temperatures start to get over 400 degrees. Many studies show that the temperature primers ignite is close to 650 degrees. Most people recomend drying for an hour our two at a temperature between 175 and 180 degrees fahrenheit. If you decide to use this technique, it is important to remember that there is lead in primers and gun powder, it would be best to use a seperate oven and baking sheets than you use for your everyday cooking to avoid exposing you and your family to lead.
Manually Hand Cleaning Brass
The least expensive options would be to manually hand clean your brass. This process can be time consuming and tedious, but it is effective and inexpensive. You don't have to purchase any expensive equipment to get started. Usually you can repurpose other items you already have in your home as brass cleaning items. When manually cleaning brass there are two popular options amongst reloaders.
Option one:
Using a container with a large mouth and screw on lid, mix equal parts brass and hot water with a small amount of dish soap, and Lemi Shine. Shake it up off and on over a couple of hours, then remove the brass and rinse off with clean water. The more you can agitate and mix it up over a couple of hours the cleaner and shinier the brass will be when you remove it. After rinsing off you will need to dry the brass to avoid corrosion. You can put the brass in a dehydrater or an oven with door slightly proped open to allow moisture to excape, at a temperature between 175 and 200.
Option two:
Using a container with a large mouth and screw on lid, mix equal parts brass and hot water with a small amount of dish soap and salt, and one third as much vinegar as water. The salt and vinegar acts much quicker than option one and the brass should not sit for more than 30 minutes before rinsing off or else the brass will start to corrode. Many people suggest not going over 20 minutes just to be safe. Shake the mixture up a few times over the 20 minutes, then remove the brass and rinse off with clean water. After rinsing off you will need to dry the brass to avoid corrosion. You can put the brass in a dehydrater or oven, with door slightly proped open to allow moisture to excape, at a temperature between 175 and 200.
Dry Tumbling

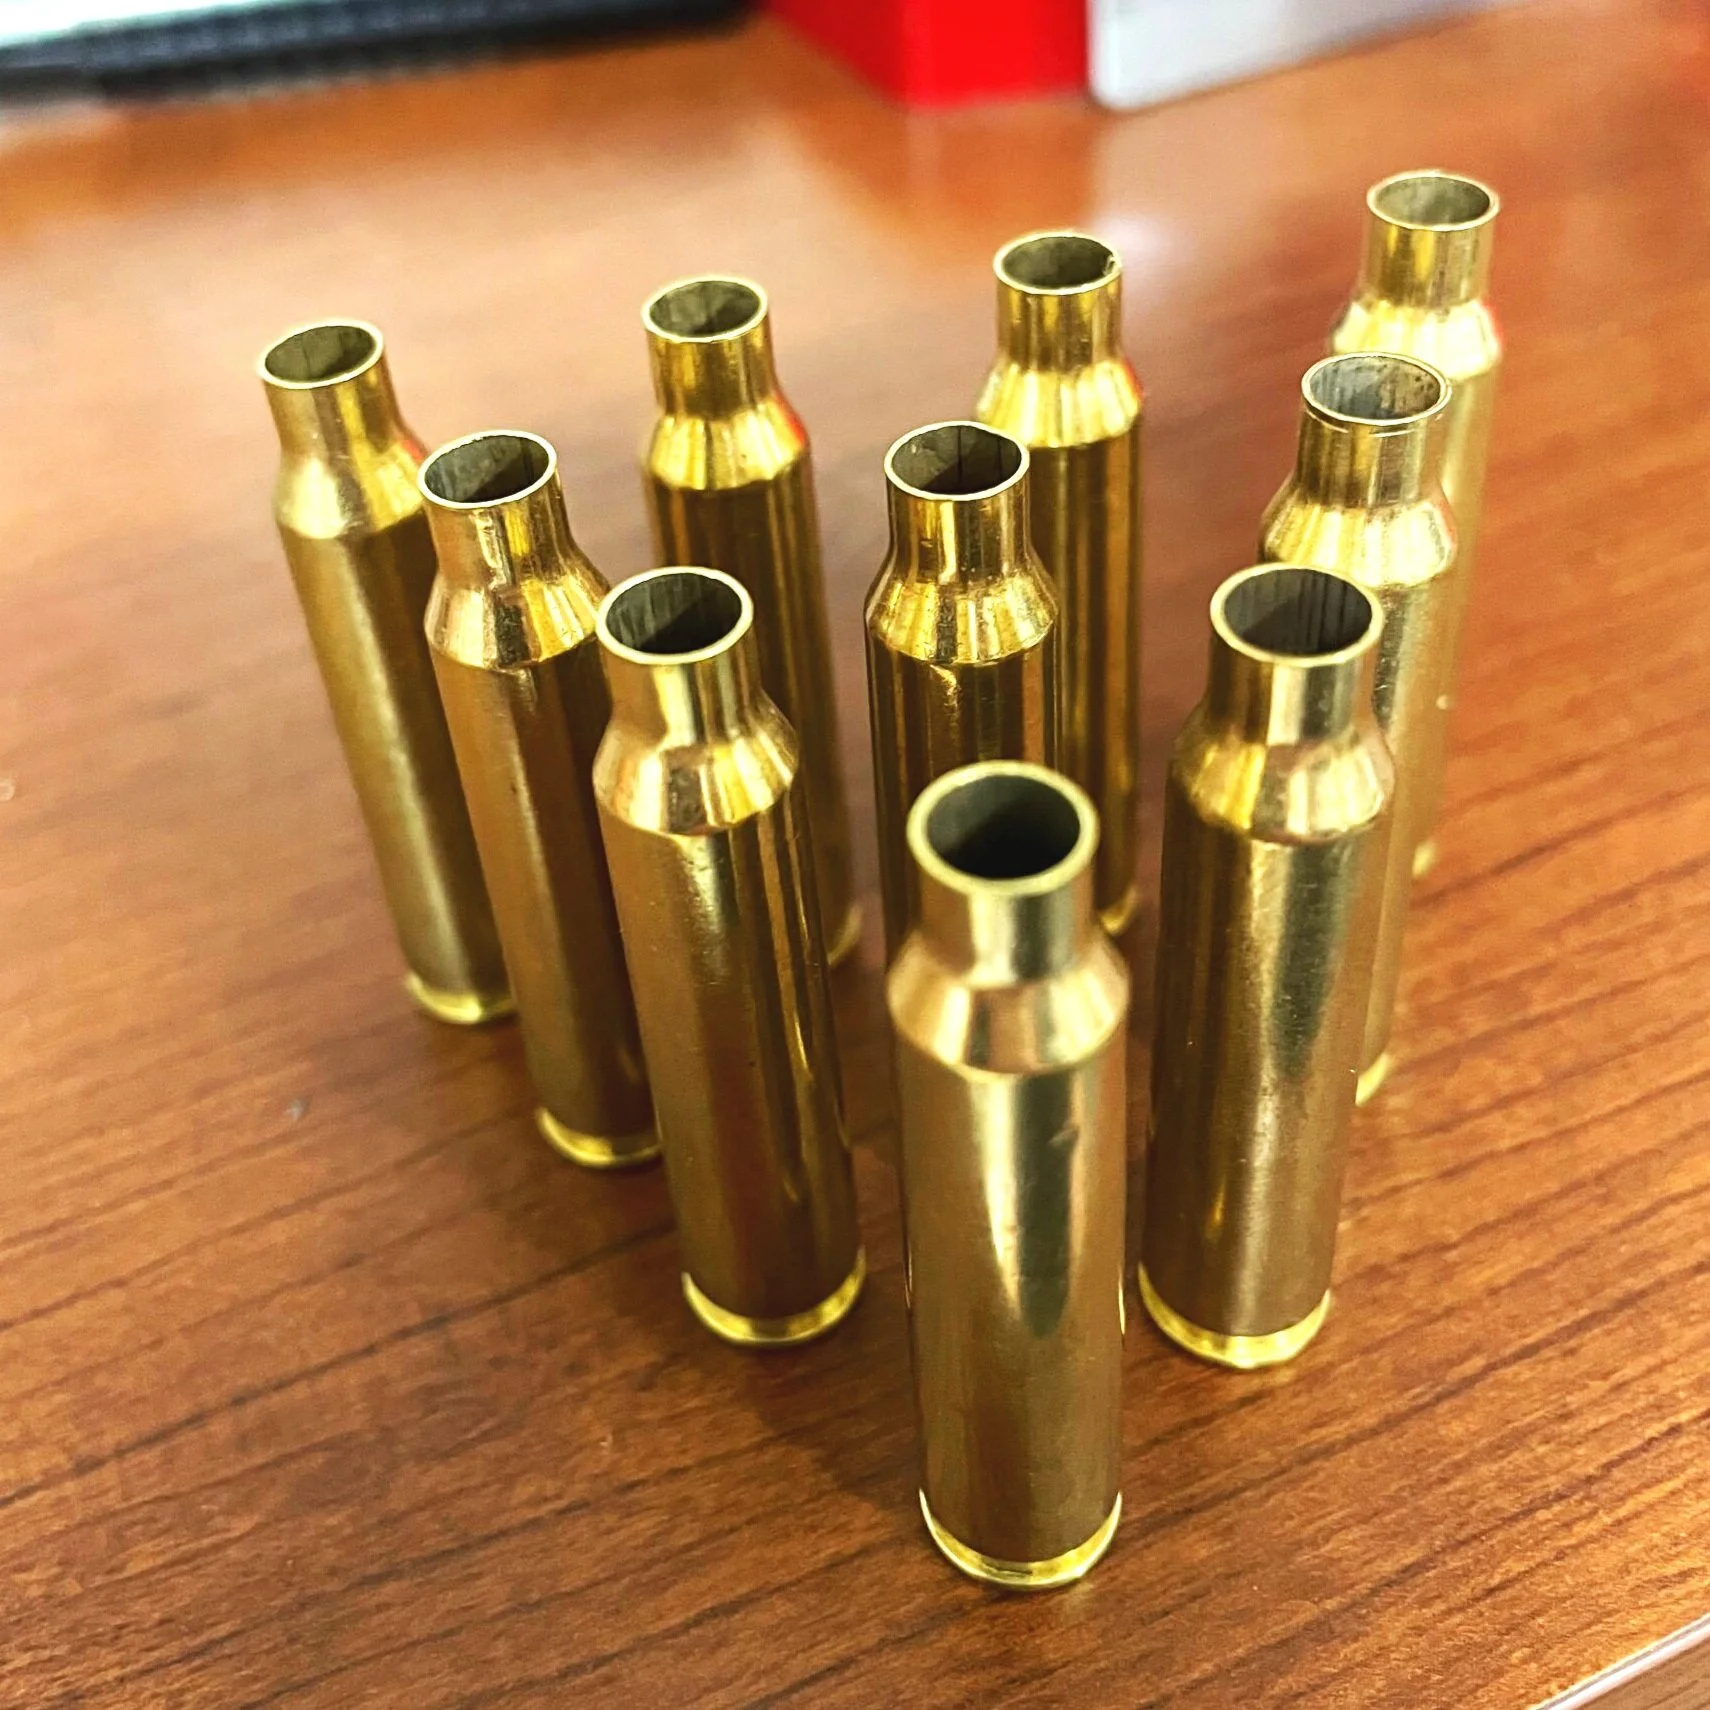
The casings on the left have not been cleaned yet. The middle casings were cleaned using a dry media and the casings on the right were cleaned using a wet tumbler with metal media.
An option for people who want convenience would be a media dry tumbler. This process is more efficient and convenient than hand cleaning, but it can be expensive. You need to spend money on a tumbler and media for the machine to work properly. The two most popular options for media are corn cob or walnut shells. You can typically use the media two or thee times before you need to discard and replace with new media. You will need to tumble your brass between two and three hours. An issue with dry tumblers is the dust they produce. I would not recomend using a dry tumbler anywhere you worry about getting dusty and dirty and needs to take place in an area with good ventilation or where there aren't any people. Used brass has high amounts of lead on them and when the dust from the dry tumbler gets in the air the dust from the machine can contain lead which could be harmful to your health. The dust produced also sticks to the brass requiring you to wipe down or clean off the brass after dry tumbling. Using a dry tumbler alone will leave your brass dull. Many people suggest placing a used dryer sheet in the tumbler to absorb some of the dust. I have tried this on several occasions and it works better than nothing but your brass will still be dull. You can add some "Brasso" or "Nu-finish" to your dry media and it will help cut down on the dust.
Wet Tumbling
For people who are looking for convenience with a greater initial cost, consider wet tumbling. A wet tumbler cost about twice as much as a dry tumbler, but wet tumbling does not produce any dust and the brass case needs less cleaning after it has been wet tumbled.
The media used with wet tumbling is metal and can be used over and over again with no need to purchase more media in the future. Some people even opt to leave out the media. The benefits to not using the media is you get to skip the step of removing the media from the brass before drying. The exterior of the brass will still look pretty good if you don't use media. However, the down side to not using a media is the inside of your brass will not get near as clean.
You can buy the more expensive wet tumbling liquid detergent designed for brass casings or many people opt for "Dawn" dish soap and "Lemi Shine", which is a mush less expensive option.
Once the tumbling process is complete you will need to remove the media before drying. You can purchase or repurpose some type of sifter to help remove the media after wet tumbling. After you have seperated the media from the casing your are ready to dry. Just like with the manual cleaning options you can put the brass in a dehydrater or oven, with door slightly proped open to allow moisture to excape, at a temperature between 175 and 200.
Reloading ammunition is a common hobby and can be done from the comfort of your home. If you're new to this process, we hope that our guide has been helpful in answering some of your questions on how to clean brass casings so that you have an easier time reloading ammo at home. Got any tips or tricks for cleaning brass? We'd love to hear about them! Coment below on what works best for you.